Friday, January 24, 2014

Vintage soda syphon


You can't help but be attracted to the striking blue of these vintage soda bottles. They catch my eye whenever I see them at the markets and whilst they were a very common sight in the 1920's and 30's very few of them have survived intact.

I now have the beginnings of a collection, well two is a good start. Both of mine are in perfect condition and I waited a long time to acquire them. I place them on the windowsill in my kitchen where they are naturally backlit. They look different throughout the day depending on the light and weather.

Bars and restaurant owners would have taken these to a facility where they would have been recharged. Can you use them? Not really. The pewter tops require special removal but they make a stunning focal point.


Saturday, January 18, 2014

Lampshade tutorial

You can easily transform a lampshade by recovering with fabric of your choice. If you don't have one already, they can be picked up really cheaply at junk shops or yard sales. 

First of all, gather everything that you need:-


  • plain lampshade
  • fabric
  • large piece of paper ( a length of wallpaper is ideal)
  • scissors
  • pencil
  • straight edge
  • spray fabric glue (repositionable)
  • glue gun
  • cutting mat and cutter ( optional) 


1. Trace the lampshade onto the paper to create a template. Take time to do this accurately following the line slowly top and bottom and marking the start and finish point.


2. Join the edges with a ruler. Add 1cm to one of the vertical edge. This will create a neat finish where the edges join.


Add 1cm to top and bottom edges.


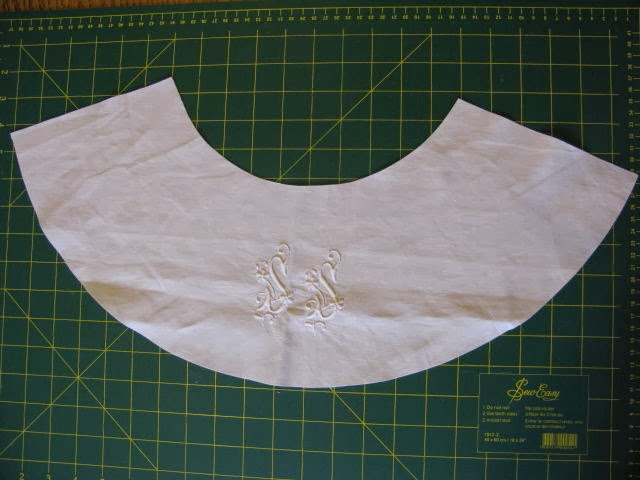
3. Cut out the template and then trace around it onto the wrong side of your fabric. If you are using a patterned fabric, be sure to position the template along the grain of the fabric. If you are using fabric with a motif or embroidery like mine, make sure it is central. Cut out the fabric.


 4. Spray the wrong side of the fabric with a thin layer of glue. Do this in a well ventilated area. Turn down the vertical edge with the 1cm allowance and glue in place.


5. Starting at the raw vertical edge, carefully roll the shade along the fabric, lining up the edges as you go. Most small creases can be smoothed out but you may need to peel it back from time to time to ensure it lays flat. The folded seam should neatly cover the raw edge where they meet.


6. When you are happy with the finish, tuck under the overlapping fabric at top and bottom. You may need a little glue from a glue gun at this stage to ensure it sticks firmly.


7. That's it. Sit back and enjoy your handiwork!


Friday, January 10, 2014

Wood Art


From October onwards our French neighbour busies himself from dawn to dusk moving, cutting and meticulously stacking his woodpile. Trailor loads of metre long logs are trundled down to the designated area and arranged in a geometric style that would please any maths teacher.

For several weeks the ritual continues until at least a year's worth of logs have been accumulated and stacked. The end is result is very impressive. In France, wood is measured in 'stères' or cubic metres and even a modest house can burn several stères a year, hence the need to constantly replenish stocks and make sure wood is seasoned.


Woodpiles are something of an obsession in rural France. As much part of French life as growing and preserving produce. 


Does size matter? Apparently so. The bigger and longer the better! A woodpile it seems is a symbol of masculinity. Hunter-gatherer at it's most basic level. 


We haven't needed much wood this year. So far the winter has been mild. I'll go and touch wood!